自宅内でスマートホーム用のサーバとして動かしているRaspberry Piは今のところ手動でデプロイ、アプリケーション実行などの管理をしており、このあたりを自動化したい。
現状やり方として見つかったのは2つ
- AWSCodePipelineを使う
- https://aws.amazon.com/jp/blogs/devops/automating-deployments-to-raspberry-pi-devices-using-aws-codepipeline/
- この中で利用するCodeDeployが対応しているのはWindows, Red Hat, Ubuntuだけなので、Raspbianの場合には使えなさそう
- AWS Systems Managerを使う
- https://aws.amazon.com/jp/blogs/mt/manage-raspberry-pi-devices-using-aws-systems-manager/
- AWS Systems Managerというサービス経由でAWS管理下のインスタンスのような形で管理できるっぽい。
AWSCodePipelineはubuntuでないと試せないので、ひとまずAWS System Managerを使ってどんなことができるのか、ひとまず試してみる。
Step1: hybrid environment用のIAM service roleを作成する
Windowsのaws cliで実施。linuxも同様。下記公式参照。

下記のtrust policyでSSMService-Trust.json を作成
{
            "Version": "2012-10-17",
            "Statement": {
                "Effect": "Allow",
                "Principal": {"Service": "ssm.amazonaws.com"},
                "Action": "sts:AssumeRole"
            }
}
service roleを作成
aws iam attach-role-policy ^
    --role-name SSMServiceRole ^
    --policy-arn arn:aws:iam::aws:policy/AmazonSSMManagedInstanceCore
session tokenを作成するために、上記で作成したservice roleを有効にする。
session tokenはmanaged instance permissionにSystems Managerを使ってコマンドを実行する権限を与える。
aws iam attach-role-policy ^
    --role-name SSMServiceRole ^
    --policy-arn arn:aws:iam::aws:policy/AmazonSSMManagedInstanceCore
いくつかOptionalがあるが、該当しないので省略。
Step 2: hybrid environment用にManaged-Instance Activationを作成

AWS Systems Managerの「ハイブリッドアクティベーション」を選択
「アクティベーションの作成」をクリック

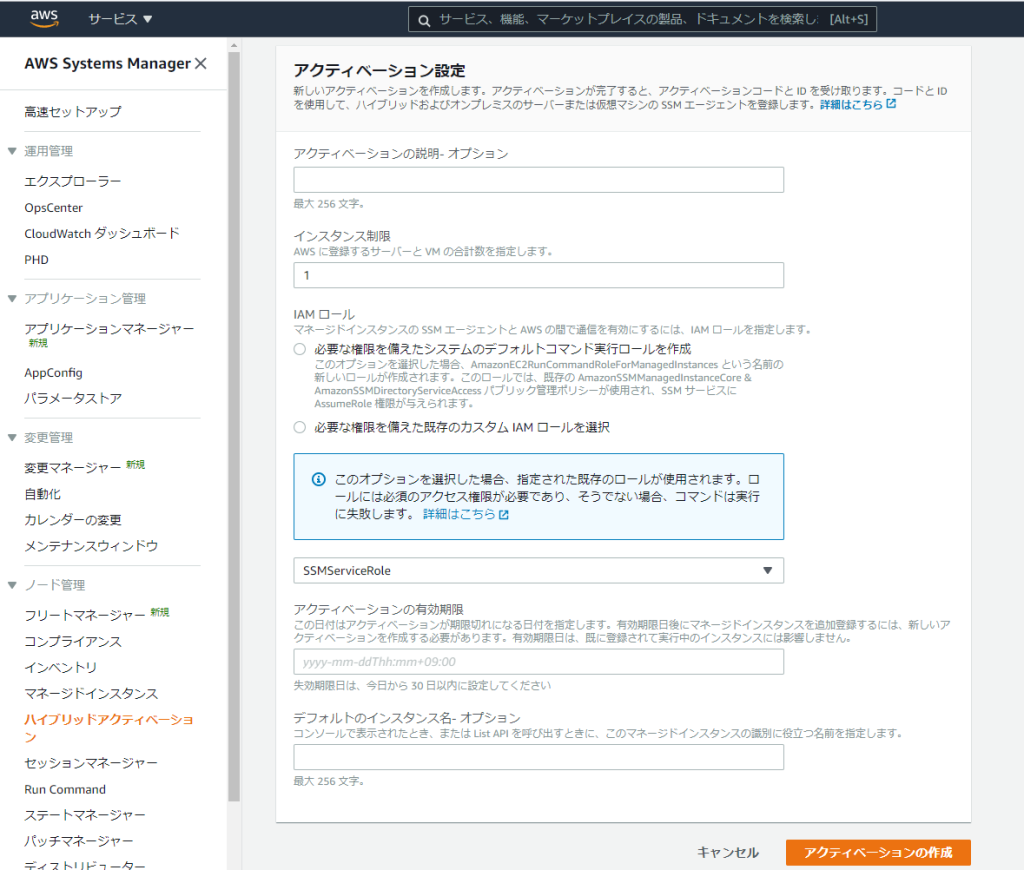
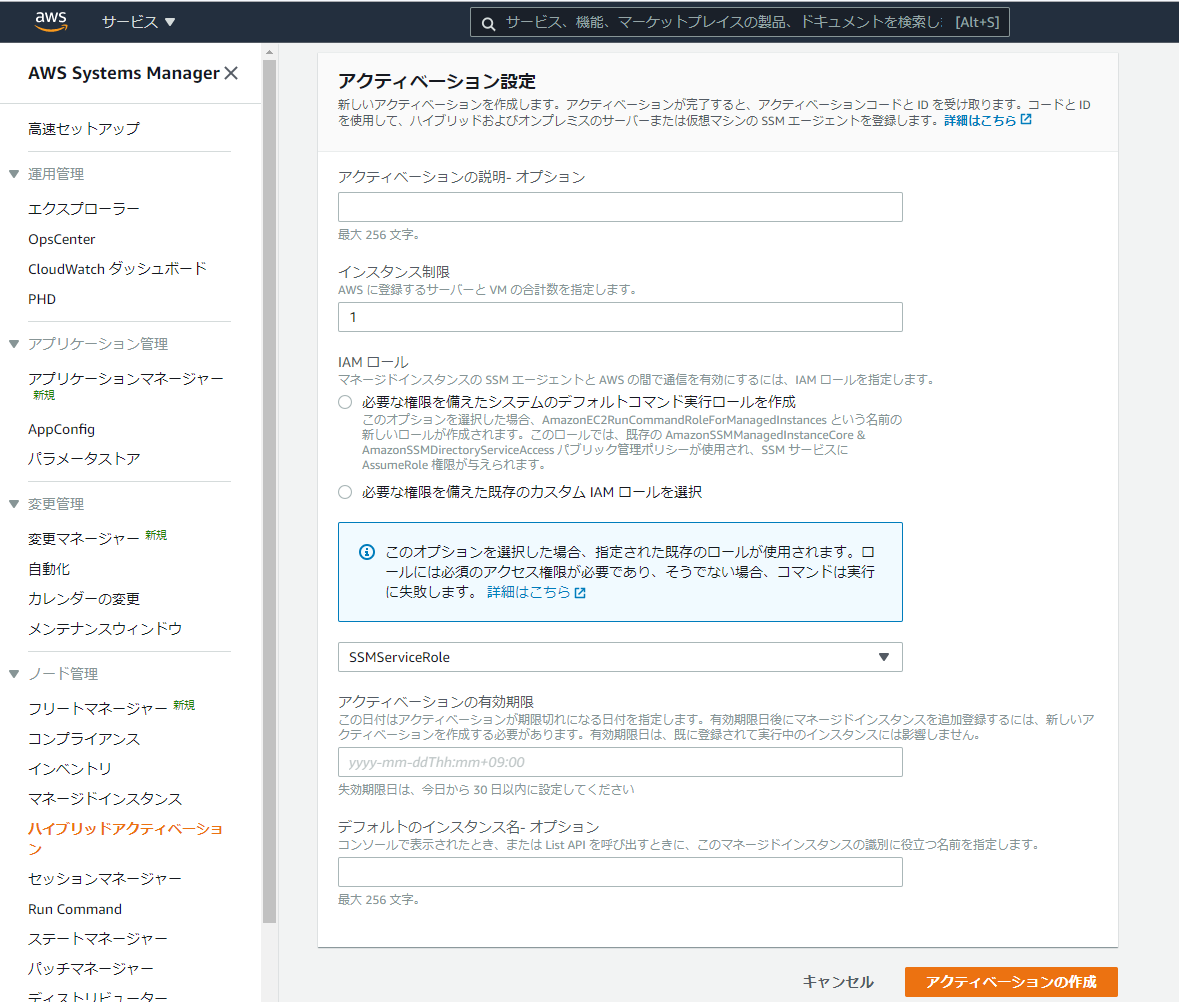
アクティベーション設定が開く

インスタンス制限は登録したい数に合わせれば良さそう。
IAM roleには先程作成したものを指定。
「アクティベーションの作成」をクリックすると、遷移先の画面上にActivation CodeとActivate IDが表示されるのでメモ。次で使う。
Step3: ラズパイにログインし、Raspbian上でインストール

下記を実行。activation-code, activation-idは上記に書き換え。regionはap-northeast-1にした。
mkdir /tmp/ssm
sudo curl https://s3.amazonaws.com/ec2-downloads-windows/SSMAgent/latest/debian_arm/amazon-ssm-agent.deb -o /tmp/ssm/amazon-ssm-agent.deb
sudo dpkg -i /tmp/ssm/amazon-ssm-agent.deb
sudo service amazon-ssm-agent stop
sudo amazon-ssm-agent -register -code "activation-code" -id "activation-id" -region "region"
sudo service amazon-ssm-agent start
これでSystem Managerに登録され、Run Commandからコマンドの実行ができる。
コマンドドキュメントにて、実行するコマンドのタイプにAWS-RunShellScriptを選択、コマンドのパラメータに実行するスクリプトを書けば何でもできそう。


コメント
[…] 自宅内Raspberry Piへのデプロイ自動化 その① -AWS System Managerへの登録- […]